![]() Namalsk
is a small lore-heavy unofficial map and mod solely made by respected Arma modder and Creative Lead & Senior Map Designer of Bohemia Interactive, Adam "Sumrak" Franců. Originally a personal project for Sumrak, Namalsk's age outdates the original DayZ mod by four years, created in 2008 as a map and modded campaign called "Namalsk Crisis" for Arma I. He rereleased it for Arma II in 2011, and for the third time released for the DayZ Standalone in 2020.
Namalsk
is a small lore-heavy unofficial map and mod solely made by respected Arma modder and Creative Lead & Senior Map Designer of Bohemia Interactive, Adam "Sumrak" Franců. Originally a personal project for Sumrak, Namalsk's age outdates the original DayZ mod by four years, created in 2008 as a map and modded campaign called "Namalsk Crisis" for Arma I. He rereleased it for Arma II in 2011, and for the third time released for the DayZ Standalone in 2020.
Namalsk is a fictional island presumed to be set in the Russian Bering Sea. Intended to be a hardcore map, it's mostly barren with little civilization. Namalsk is covered entirely by coniferous forests while tall mountains in the South are blanketed by permanent snow cover. A large portion of the map is covered by desolate ice sheets. It has only one major city on the whole map, Vorkuta. Spawn zones are spaced out across the Northern coastline. The map is naturally bottlenecked into two, where predators only spawn below the crossing.
The OST and ambient noises for Namalsk are extremely well made, changing depending on time, weather, and location. It comes and goes, comforting you in quieter moments or making night combat more eerie on top of the distant rumbles of an incoming storm. The music player to the right is completely functional * , listen while you read! I've included 24 tracks from the map's soundtrack as well as the 4 ambient tracks.
Namalsk is an absolute homage to S.T.A.L.K.E.R.: Shadow of Chernobyl (2007). Not only directly using soundeffects from it, but it also directly reflects the map's perilous mission to reach an alien planet through an anomaly. 99% of Namalsk playtime is freshie shenanigans and getting shot in the North, while the adventure down South can take a lethal turn at any time due to the dense population of predators, hordes of zombies around military areas, and geared players with the same mission as you: kill on sight to survive. The map's mission can take days to weeks across many lives to complete. The site below is Sumrak's website on Namalsk.


 I. Basics of Namalsk
* This chapter goes over starting tasks like making fires to avoid catching a cold and preventing frostbite, and finding towns by following roads and powerlines. For the basics of DayZ in general, read this page first.
* Spawning In - So, you've woken up on the coast. What now? Your character will always spawn facing true North, so you can use this to orient yourself a little. Looking out to the sea is the most common way to spawn. If you're facing the forest when you spawn, you've spawned at a rarer bottom coast spawn. Either way, you can only spawn in the northern divide of Namalsk. Generally the sea will be on your right if you're going west and the sea will be on your left if you're going east. The rarer bottom spawns have this rule flipped.

With your back to the ocean, heading straight into the trees/fields is your best option to find a town in hopes to find a sharp object so you can make a fire ASAP. The only two towns on the coast are Lubjansk to the very far western side, and Nemsk to the very far eastern side. Most spawns will not be around buildings, so walk into the woods and find yourself a road or powerlines to follow. If you see a big hill and the conditions are clear, it's a good idea to look for buildings in the distance. The best places for starting loot are Outskirts (red dot) and Jalovisko.
* Frostbite - Your first line of action is to turn on your heatpack and try to find any clothing you can for every slot (minus eyewear slot) to prevent one of Namalsk's unique features: frostbite. It's an incurable permanent debuff to your max health depending on which part(s) of your body receive it. It can be lightly fended off by staying warm using fires or heatpacks, but ultimately your task is to wear any clothing, regardless of insulation or condition (except for ruined, so keep your gear repaired), on all of your slots.
It will also permanently give you the sick symbol
If you don't find clothing for a specific slot you can use some rags to make improvised wrappings, but don't use all of your rags as you need to bandage yourself if you get cut. If you have a sharp object, cut up some thin clothing for rags. Mouse-wheel scroll through the rag's crafting options while it's in your hand to make different wrappings. I recommend hand or face wrappings first, but don't make both unless you have rags to spare, wrappings take at the very least 2 rags. You can see the progress of frostbite in your inventory by looking at the color of your torso, legs, head, face, hands, and feet's clothing slots. Blue at first to show you your skin is at risk, and white when you've succumbed to frostbite. If you don't know what counts as a sharp object, see more in the Weapons and Tools section of my Cherno page.
And don't worry too much about frostbite, any item on all your exposed (blue) slots will protect you from it. You'll only have the risk if your clothes get ruined, as ruined clothes have no insulation at all - but don't immediately take off clothing when they ruin as you can still use its inventory space until you find a new shirt. Staying warm will not always be as bad as it is at the beginning, as making fires will be less often because Namalsk has a unique feature called cold resistance, meaning over time your character's heat will decay slower the longer you live.
Face, Hand and Feet slots: 20% of your max health for each slot
Head slot: 14% of max health
Torso and Legs slot: 8% of max health for each slot
* Don't Run Around The Coast - Running right along the ocean's coast looting beached boats for too long is a bad decision due to your need of finding warm clothing, food, and a knife to make a fire or a gun to protect yourself. Going instead straight into the forest, soon enough you'll find yourself at a road, powerlines, or a hill where you can climb up to see skylines in the distance. All roads and powerlines will lead you to some sort of civilization. Keeping note of the direction of gunshots can also help you to orient yourself to civilization. Specific tall buildings through the woods will slowly become more and more recognizable. No town shares the same skyline landmarks, so pay attention to their individuality early on. Radio towers and shacks are the only landmarks that occur in multiple places, but the hills radio towers are on are worth climbing up to if the visibilty is good so you can see buildings in the distance. Shacks usually have weapons and tools as well.
* Warmth & Fires - Another extremely important starting point is to make a fire, to postpone the common cold and frostbite if you haven't found clothing for all your frostbite-risk slots. Search for high or best insulated clothing to retain warmth from your fires for longer, and freeze in harsh conditions slower. During a blizzard, conditions will be cold and wet, which quickly kills you once you've hit dark blue for too long. All canned food and drinks found will be frozen and will need to be thawed to at least drenched to consume.
Common fire spots are houses with a fireplace, a fire barrel in industrial areas, or you can make a fire anywhere outside, but the best cover is in a tree. In blizzards, it can be increasingly hard to get a fire to light outside due to the wind and wet conditions. Wind direction is important, so use something big to use as cover such as a building's wall or a pine tree. Wet sticks, bark, and matches won't be usable until they dry out naturally. To find out how to make fires, check the respective chapter here. Try to remember to check if a fireplace is wet before attempting to light a fire. Wet fireplaces will never light until they are dry again so if it is, you'll have to relocate. Finding a knife is an extremely important starting task as you need something sharp to gather bark off of trees, open canned food, and cut things into rags.
Most likely you'll spawn with a heat pack. The sooner you use this the better, because they aren't that powerful and the 2 slots should probably be taken up by something more useful once it's ruined. You will need at least one short stick to fuel your fire, and something sharp to gather a single dark bark from a tree for your tinder. You only need one tinder per fire. Place the single bark on the ground where you want your fire. Pop your starting flare and light the bark, put the sticks into your hand and then interact with the fire, and stay within 10m to slowly gain the heat buff (the + on your temperature stat is the buff). Don't forget to defrost any frozen food or drinks. Holding inedible hot food (like guts and inedible meat/fat) in your inventory will let you stay warm for longer. I'll discuss this more in Orb Jumping.
* Navigation - Depending on what the conditions are and what time it is, being able to see buildings in the distance is another goal. Vorkuta's very hard to miss with the tall apartment buildings and two yellow cranes. These apartment buildings occur nowhere else on the map. If you see a large water tower, and/or a large farm-type building, that's Jalovisko. If it's a military on a cliff directly on the coast with a single house across the shore from it, this is a spawn above Jalovisko, so you can travel straight into the woods with the sea to your back. If you're still near the coast and you see colorful cargo crates by the sea, that's Lubjansk. If you've spawned next to a few broken buildings in a fenced-in area, you're near Lubjansk. Nemsk is a small town by the shore, and the dirt path leading out will eventually take you to Jalovisko.
If you spawn in with nothing around you, just head straight into the woods, you'll come across a point of interest at some point. Roads and powerlines will lead you to civilization. If you see a good hill, it's a good bet to get a bird's eye view of the area if the weather permits.
TLDR: Prevent frostbite by making hand, face, or head wraps. You have to find a knife to make a fire as soon as you can. Keep yourself warm by using heatpacks or making fires once cold to prevent getting the flu (it turns into the lethal Pneumonia if left untreated). Keep in mind that unlike every other map, civilian zombies will not commonly drop you food, but it's not impossible. Military zombies maintain their normal high drop rate, so it's always a necessity to check their bodies.
Find a town to loot food, water, clothes, and guns. If you find a corpse be wary and scope out the area before attempting to loot it.
back to top
 II. Food and Water
* Water is going to be an issue for you at some point if you’re new to the map. You'll have to study where the pumps are on iZurvive and drink sodas sparingly, saving them for later. There are only 2 pumps down south, so bringing a cooking pot to boil snow for water is a must-have to stay alive. Always take waterbottles when you see them. Also, you’ll drink much more water and faster drinking from a bottle at the pump compared to sipping the water from your hands, so sharing your bottle with teammates that don't have one will help you guys to leave the pump with more water consumed in a shorter amount of time.
Northern pumps (6): Lubjansk, Alakit, Vorkuta schoolyard, Vorkuta Outskirts, Jalovisko, and Nemsk.
Southern pumps (2): Right after crossing over, its inbetween the Sebjan Dam and Marsh on the shoreline right next to a military tower. Then there's one at Norinsk.
Pump water is always clean, though found containers with water in them can be contaminated with cholera. There are two ways to purify water. One is using chlorine tablets on a container filled with water, and the other is from boiling water in a cooking pot.
* Purify the water in a container using chlorine tablets. Only one is needed per use. Chlorine tablets are limited use items and they only stack to 14, so this isn't a technique you can use for your entire life, at some point you'll need to carry a cooking pot.
* Unfortunately you can’t boil water in any kind of bottle, only the cooking pot. This eliminates the need for chlorine tablets entirely. As soon as the water reaches HOT it is purified and ready to drink when cooled. Down south boiling snow is the only way to replenish your water supply. Remember that by eating snow straight up, you’ll get sick and start vomiting.
* Keep in mind saltwater is not consumable or able to be purified and you can't wash your hands with it either. Also, since the last time I checked draining a filtered bottle into a normal container will not truly purify the water and it will make you sick. Drink only from the filtered bottle and do not drain it.
* Food is a scarcely spawning resource on Namalsk. If you have access to a pump, drinking lots of water will help with starvation a little.
* In the North, searching houses and apartment buildings are your only source of canned food and dry goods, so you’ll soon find fishing is something you will have to prepare for, as hunting isn't always an immediate option for food. As soon as you find a rope and a blade, you're set for fishing. Hunting is possible as long as you have a loaded gun or crossbow and you hear animals. If you haven’t heard any, there’s a large chance you’ll find goats and sheep in the fenced fields outside of Jalovisko. Deer, foxes, boar, and hares spawn scattered across the entire map. Foxes and hares specifically spawn next to you, unlike deer and boar which follow a set grazing path. Listen out for the small squeaks from a hare and the loud yaps of a fox to find them. You can only fish in saltwater due to all inland ponds being frozen.
* Down South, your only reliable source of food will be saltwater fishing along the coast. Hunting is always an option but sometimes you can go hours without hearing any animals. When in doubt remember that Tara has plenty of animal spawns. If you take a multivitamin, you can eat wolf and bear meat without getting sick. Remember that without a pill you will contract salmonellosis and will throw up your stomach contents multiple times over the course of the next hour until you cure it. Salmonellosis also reduces the time it takes for your stamina to recharge and dehydrates you.
* Fishing is easy. As long as you bring a rope with you, you can make an improvised fishing rod by combining it with a long stick. Find some grass (not snow) and put a knife in your hand to dig for worms. Every interaction circle equals one worm, by far the most tedious part of fishing. Hoes and shovels will yield more worms. Then, using a sharp blade on a short stick or some bones, you can make an improvised fishing hook to put your worms on. Improvised fishing gear yields small calorie fish. By finding an actual fishing rod, or hook, this will greatly increase the calories in the fish. Find fishing rods next to beached boats on the shoreline, and search any boonie hat found for a chance to find a hook inside the hat’s hook slot. Fishing jigs are a very helpful rare item that helps with time spent digging for worms as it takes up the worm slot.
* Predator Meat is sickness inducing! Before update 1.26, you could eat cooked wolf and bear meat without any consequence. When Sakhal was released, bear and wolf meat became infected with salmonellosis. You can eat the steaks along with any raw meat or fish by taking a multivitamin pill. You should only eat raw/predator meat in the 5 minutes you have the pill symbol. If you digest the food (when your arrows go down you’re “digesting” it) while you have no symbol, you could vomit it all back up. This should only be used as a last resort, and you should save your pills as much as you can for colds. Untreated colds will kill you after you progress to stage 3.
* Cannibalism & Kuru is something you're bound to catch wind of. Due to the lack of food found across the North, survivors are desperate. Some may rob you or kill you on sight for the chance you have supplies they need. Cannibalism is a common option people take on Namalsk for these reasons as well. As well as the loud and obvious laughter you emit, a true drawback are the twitches while ADSing. In combat against players, predators, or hunting for food, your hands will periodically jerk.
The constant laughter gets annoying after the sixth hour of giggling, and the twitching could very well be your downfall in combat. Players will be quick to assume you’re hostile if they hear your laughter before seeing and talking to you. But sometimes, your options are extremely limited, so you may have to eat a dead player or find someone to eat.
back to top
 III. Blizzards and Emissions
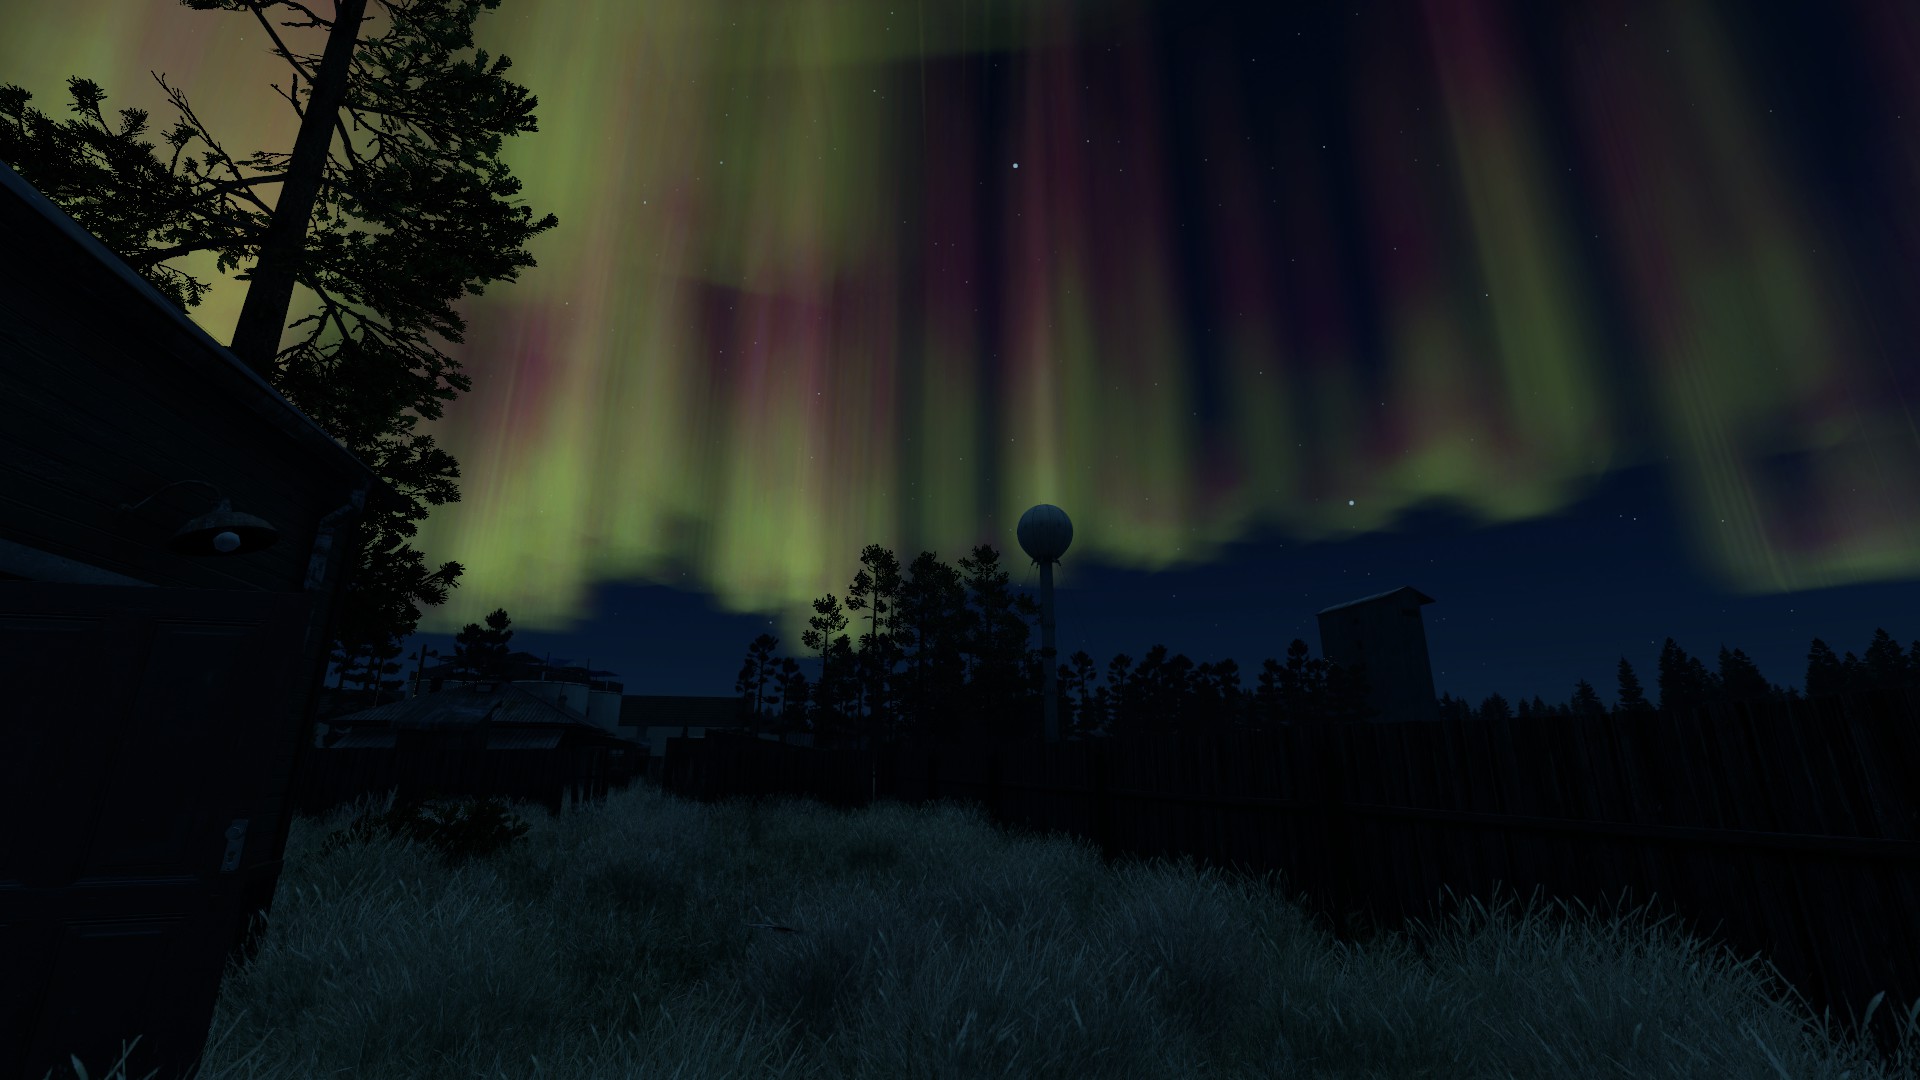
* Namalsk isn't home to any dynamic events on Chernarus or Liv like dynamic heli-crashes or gas, instead there are three unique events: blizzards, cold weather events, and the Storm. I'll explain how to survive EVR storms briefly, but if you're interested in what they are, see the lore section. There is also an aurora that brightens the night skies occasionally.
* Blizzards slowly progress from the normal snow flurries, you can see the start of them when you see your visibility start to drop off. As soon as you see the fog forming, figure out where to make your next fire, as you won't be able to see very far at all once it sets in. Blizzards come with high wind speeds, making zombies oblivious to footsteps near them. The wind will also effect if your fire will light outside, so choose a wind-resisted spot such as behind a wall or underneath a pine tree.
If you decide to power through the blizzard, your clothes will start to get freezing wet, plummeting your body temperature and making you heavier. You'll have to make a fire, wring your clothes, and gain the heat buff to survive the temperature outside. If your temperature stays empty for too long, you'll catch a cold and promptly start to freeze to death. Eating warm food will warm you up fast, and lots of people keep inedible food at the hottest temperature in their pockets as make-shift heatpacks.
* Cold Weather Events are events where the global temperature on Namalsk is much colder. Your vision will be blue, and you'll get colder faster.
* EVR Storms are also known as "EVR Events", "emissions", "blowouts" or most commonly "the Storm". It's an event where deep rumbling builds up to a chaotic lightning storm where harmful ionizing radiation sweeps across the entirety of the island, harming any player not taking cover under a roof. All survivors are knocked unconscious during the event, except for those who have found the protection device.
Deep rumbling will be heard map-wide up until lightning will start to flash in every direction to signify you to run for cover. Major tremors will then sound-off, your vision turning a deep red, the last tremor knocking you unconscious onto the ground for a few moments.
If you're not taking proper cover, your survivor will grunt in pain with each tremor. When you are knocked out when outside of cover, you'll wake up with -50/100 health, meaning if you're less than half health the blowout will be fatal.
* It's worth it to note that being inside running cars will dry your clothes and give you the heat buff. This is basegame, but is especially helpful to know on Namalsk.
back to top
 IV. Navigation

The only towns in the northern divide of Namalsk (left to right) are Lubjansk on the northwestern shoreline, Vorkuta in the center, Vorkuta Outskirts to the slight south-east of Vorkuta, Jalovisko to the east of Outskirts and west of Nemsk, and finally Nemsk on the far eastern shoreline. Military zones are scarce in the spawnzone, two are right next to Lubjansk, Vorkuta is lined with military checkpoints offering a few tents, and the Refugee camp on the southeast road leading you out of Outskirts.
Note: I didn't include Alakit in that list. Generally, Alakit is not worth going to at all unless you desperately need a waterpump while inbetween Lubjansk and Vorkuta. Bandits are the only people I've ever encountered here. Alakit refers to two different areas connected by the same road: The good area is a small fenced-in industrial area with broken buildings and a tall climbable tower. A waterpump sits outside of the fence in a clearing. This half of Alakit is worth looting and stopping by due to the pump and some good industrial loot like heavy weapons and some tools. There's a large area down the road towards Vorkuta with a thick concrete barrier wall surrounding a largely empty industrial area with piles of broken concrete and lots of zombies. There is nothing to loot here and is essentially a death trap.
This list of towns is sorted roughly by the usual population of survivors, highest to lowest.

* Vorkuta's skyline staples are the tall apartment buildings and the two yellow cranes on either side of the city. Most of the gunshots you will hear throughout your time in the North will come from Vorkuta. It's absolutely the biggest hotspot for PvP in the North, and honestly a fucking cesspit as there's always nothing to loot except for scraps off dead survivors. The school in Vorkuta is extremely dangerous due to the one waterpump in the city being in the courtyard of it. I never step foot into Vorkuta specifically for food or water but it is a necessary stop in your journey for pills (to fend against colds with multivitamins and advanced sicknesses with tetracycline) and alcohol tincture (to clean your rags and treat blood infections) from the hospital, but even popping into the hospital is extremely dangerous as lots of players come and go, as well as the chance to be shot through the windows or on the roof. There are no other hospitals anywhere in the North, but alcohol tincture, pills, and other medical supplies can be found in houses and cars anywhere on the map, though it is a little rare.
I genuinely cannot stress to you the amount of roof snipers in Vorkuta - guns and ammo commonly spawn on the tops of apartment buildings, so listen out for footsteps before climbing the ladder up to the roofs. Limit your time standing still next to windows and roofs, don't walk in the middle of the street, and listen out for footsteps or player noises on the roof of your building. Don't use doors or walls (even metal ones) as cover as they're penetrable by high caliber bullets, don't peek anyone to figure out where they are. The best option is to prone, use cover and relocate. Vorkuta is by far the most aggressive place in the North due to the amount of survivor activity, lack of food, excess of guns and ammo found on roofs and in the military checkpoints, active cannibalism, and the maddening amount of zombies.
Vorkuta's military checkpoints are on the roads surrounding the city. Necessary items like jackets, pants, armor, helmets, and ammo are found in the tents, though scarcely. Military zombies will drop their vest rigs and some ammo. The fire station is a hotspot due to the military checkpoint behind it and the extremely warm, durable, but heavy firefighter clothing, along with gasmasks and NBC gear (needed for Namalsk's mission), firefighter helmets, and the powerful fireaxe. Apartment buildings are probably looted already, but if you do find stuff in one it's worth checking them through. If you can't find food, then you'll need to find your way to Outskirts to find canned food, or the goats & sheep that reside in the field next to the residential area of Jalo. I can't recommend cannibalism so early on into your run as it's a dead giveaway to your location from your laughter, the hindrance to aiming down sights from the twitching, and ontop of that you shouldn't stick around in Vorkuta for longer than you need to, as there are plenty of people who live off of killing other survivors to sustain themselves.
* Jalovisko's skyline staples are the tall farm building and the ball-shaped watertower building. All of its paved roads connect directly to either Nemsk or Vorkuta. Jalo is also a hotspot due to one side being a residential area that spawns lots of food, warm clothing, and weapons. If you come up on the two-way split road in Jalo, the single road leading out into the woods goes to Nemsk and both roads of the fork up and down will take you to Vorkuta as they run horizontally parallel to each other. When it comes to sniping spots, stay wary of the tall farm building because it's climbable. People can also be up on the scaffolding and rafters of the long building, and any roofs or second floor windows.
Sometimes Jalo is full of friendly freshies, and sometimes there's people waiting around corners for you or waiting for you to open a door for their perfect shot. The forested hill up the left side of the residential area always has active foot traffic, so avoid staying in those trees and be wary while passing through them for pine-tree ninjas. If you have a lockpick, the safest building is probably the barn, as all four walls are lockable. Keep in mind other survivors will attempt to unlock locked doors by bashing it with a melee or unlocking it with their own lockpick. Every other fire spot is fair game, all houses in Jalo have angles, so staying prone on the floor is your safest option if you have to stand near a window. I'll mention the safest building type in a second since it doesn't appear at Jalo.
Distinctive notes of Jalo:
* a PA system building
* only Barn buildings on the map
* (high-trafficked, right next to pump) Long Red building w/ sneaky scaffolding
* The water pump
* Staple climbable tall farm building
* The fenced-in field next to the civilian area that spawns goats/sheep regularly
* Vorkuta Outskirts is a major stopping point in people's journey from Jalo to Vorkuta or Vorkuta to Jalo. There is a high mix between geared and fresh survivors in Outskirts due to its proximity of the Refugee Camp just up the road. There are two sides to the town, the "topside"/"right side" and "bottom side"/"left side" are okay ways to distinguish them. Both sides have extremely similar buildings so specific callouts are absolutely needed for what side of town you're in. The water pump lies directly inbetween the two sides up on a hill covered by trees, where you can get a perfectly clear view of Vorkuta. Always stop and recon the area before drinking from it, and be aware that people like to snipe people drinking from this pump - if you see dead bodies, don't fall for it.
My favorite house type on Namalsk occurs only in three places - the bottom side of Outskirts, Lubjansk, and the farthest southern town on the island, Brensk. It's one of the two cabin type houses found, but the reason it's the safest is that there are no head-height windows in the back room with the fireplace, which sets it astray from every other house type in Namalsk. It's not completely fool-proof though! Anyone with a sniper can sit on the roof across the way and have a clear view into the room, meaning you will have to keep low. Lots of people will realize this house is hard to get into and just wait until you eventually come out. The first room is unsafe, but the front door acts as a sound alarm for when a player has entered your building so you can prepare. The window in the back room is vaultable, meaning you can jump out from inside, or players can jump in from the outside. It sounds unsafe, but players vaulting are to your advantage due to animation locking. You'll be able to tell when someone's about to come through that window.
If escaping isn't an option, there's even a solid hiding place in the back room - the slightly open closet. It's penetrable by bullets but you have the advantage of hiding yourself with your gun out by standing behind it and not moving. Be patient and don't prefire the door being opened because if you miss, you have no solid cover. Keep in mind survivors can see your freezing breaths, so by holding left alt don't face a direction that will make it visible. At night in dark houses the breaths are easier to see. If you conceal yourself well you can bait someone into peeking, looking for you. This isn't a secret however, which means that if the person is geared enough they might just shred the closet at their first chance if they've been fucked over by it before, which makes this a much better house to use in the North rather than in the extreme far South at Brensk.
Distinctive notes of Outskirts:
* the safe cabin building on the bottom side/left side
* the water pump on the hill inbetween
* the Refugee Camp (RF1) located up the hill, this road leads right to the crossing if followed
* Lubjansk is a chaotic coastal port town in the western part of the North. It is home to a partly military cargo port on a small peninsula with a large crane. Up the road from the port a little bit is the actual civilian housing area, with a few houses and a water pump. It is in close proximity to more military bases than civilian homes, making it a harder town to live through due to less amounts of food and no truly safe houses to make fires, though there are more clothing, weapons, and especially grenades to go around. The only road that goes anywhere is the long 2.5km road out of Lub that lands you right into Vorkuta. It's a long walk, taking 15 minutes. Lubjansk is considered an unlucky spawn due to this.
Lots of people will have already looted the 3 military areas that are right next to Lub, and the "crackhouse" next to the water pump is a moderately safe tower-type building that people like to hole up inside, shooting anyone that opens the door. The roof of the crackhouse is accessible by jumping out the top windows from inside, so if someone is pushing you, jumping out can help you get an unexpected angle on them.
Distinctive Notes of Lubj:
* Be wary of the amount of zombies around the entirety of the port - be sneaky in and out if you can
* The cargo area is very good for loot like clothing & weapons
* The 3 tall cylinder buildings spawn guns and ammo on top. You can even vault from one to the other
* BK-T07 and BK-M06 are both a one minute walk from town
* There is nothing to loot here. Once you have checked around, leave on the road along the coast and run through the trees instead of right on the road.
* Nemsk is the smallest spawn town, located east down the road from Jalovisko. There is not much to note of Nemsk besides the water pump and the somewhat nearby military located right next to the sea.
Distinctive Notes of Nemsk:
* Lighthouse
* The Sebjan crossings are a survivor's last pitstop before travelling into the territory of Namalsk known colloquially as the South. There are two ways to cross: the Dam and the marsh. This entire area should be surveilled before entering as other survivors can be crossing at the same time you are. It's not uncommon for someone to be sniping upon the crossings, especially the marsh crossing and the tower. Try your best not to stand still anywhere and keep this in mind for when I mention the difficulties of swimming the reservoir.
* The marsh crossing is a small strip of landbridge occupied by a military tower and a large amount of zombies. Here's an efficient way to clear this area: starting out by checking the guardshack at the start for loot, run to jump ontop of the broken tank located down the road. Melee or shoot the zombies while ontop of the tank, making sure not to fall off the tank when lunging for a heavy attack. If you do fall off, you can run back to the guardshack for safety.
You'll want to be cautious of the amount of zombies, as they disperse down the steep sides of the landbridge and can be hidden within the water. Always be aware that you may need to run back to the tank or jump onto the sandbags.
* The Dam crossing is a large military and industrial zone. This is the most dangerous crossing due to the amount of zombies and being a popular choice of crossing. There's a lot of good loot to be found here. It's impossible to clear without necessary supplies, at the very least ammo, armor, and melee weapons. This is an area that requires patience and extreme caution towards other survivors who have set up traps and ambushes. It's a highly trafficked spot so don't stay here for long.
* Swimming through the reservoir could be an option for emergencies. There are no real upsides to doing this as if you're not geared enough for either crossing you aren't geared enough to go south. Shooting someone while they're swimming will sink their loot, so if someone sees you they'll most likely wait for you to be on land. Swimming will cause you to be freezing so making a fire before or after the swim is important to your survival. Don't forget to wring your clothes out after swimming.
back to top
 V. Player Combat
* The amount of player interactions you’ll have varies depending on the amount of players on your server and random chance. Around 40 players is in my opinion the best population for Namalsk. It’s difficult to leave the North with a server pop of 70, and I think 40 is a nice medium. Keep in mind Vorkuta is always a hotspot even with only 5 other players on your server, though players on low-pop servers are usually new players and would prefer teaming up anyways. But take your pick, as there’s many servers of every population for Namalsk.
It’s generally a good idea to talk to other people you see nearby, but if they are geared and have a weapon it’s a better option for you to keep your distance and plan for their demise instead of risking them shooting you. Other players can be aggressive a lot of times but eventually you’ll come upon someone who is like you.
You will need to keep a watchful eye and your ear out for fast footsteps and player sound effects. Watching areas before running in is extremely helpful with understanding the population of the surrounding environment. Having a gun in hand and sweeping rooms will help you be more on your toes for others. Remember that talking to people gives the chance for the possibility of both players leaving alive, but also gives them a chance to figure out where you are by your voice. Never put too much trust in anyone you meet until proven otherwise.
You have to accept very early on in your Namalsk runs that you are going to die from other players a lot. This island is so small and the trees are so thick that players will sneak up on you without you knowing it.
It’ll happen to you too - while in the forest in the north many different types of players will run straight past you without them knowing. It’s something you have to learn to expect and not let your nerves get the best of you. Always use extreme caution when preparing a fire in a forest near any town, you always want to use as many of the pine trees as you can to create a barrier.
back to top
 VI. Traps and Explosives
Namalsk is very small, so with more players playing on the server, the more deadly traps are set. In very populated servers, people in the North will even become trappers in it for the long game and wait to ambush the next player that comes by. There are certain areas that should be treated with extreme caution like loot piles in houses, popular gaps in fences, the small military sandbag buildings, etc. Be wary to keep your eyes on the ground when entering houses and in military areas, and check your corners to avoid being ambushed when entering any building, including sheds.
There are 7 different types of traps and explosives that can be used in many different combinations in this game. Traps that don't require a detonator are bear traps, land mines, and trip wires. Explosives that require you to attach a detonator unit or a tripwire are improvised explosives and plastic explosives. Claymores also need a detonator to work, but they spawn as a kit and give you the trigger of the unit. Since frag grenades can be passively used in traps on a tripwire and are generally hard to learn how to use without dying, I've included them in this section. All 3 traps that require a denoation unit to explode are range-limited, meaning if you don't want to camp very close by, attach their trigger to a tripwire.
You can attach detonation triggers to tripwires to trigger claymores or a plastic explosive. Improvised explosive devices (IEDs) do not spawn naturally, requiring you to craft it using any explosives and/or grenades in a combination of 2 and requiring one of the 4 detonation options to explode. This is the only explosive with all four detonation options, which is why alarm clocks and kitchen timers are useless items unless you're making one.
* Bear Traps
Most commonly encountered trap. They spawn unset in hunting areas, such as hunting stands, cabins, shacks, and summer camp buildings. Survivors will often place them in doorways/pathways and commonly used patches of grass, outside of random shacks, in gaps in fences, and at the top/bottom of ladders or stairs. Bear traps do not make you pass out unless your shock is already low, dealing only -20 shock. Bear traps are only fatal if you're on red or flashing health, as they do -28 health (only 8 points more than a close-range flashbang's minimal damage). But, they do always break your leg.People don't usually have the option to combine traps, but bear traps are perfect for trip-wired frags, since triggering the tripwire unpins the frag grenade and stumbles you into the bear trap. They will ruin freshie pants and send other pants to damaged/badly damaged. They can be disarmed (a long stick is the easiest disarming tool, but you can also use some long melees) or even completely avoid them by crouching over them. Despite the name, bear traps do not kill bears (4 or 5 will though), so their only use is harming players. Keep in mind zombies and animals can also trigger them, with the zombie's legs being broken and damaging/killing animals depending on their size. Once set, they remain on the ground for 7 days if nobody steps in it or disarms it during this time.
* Landmines
Found in military areas. Landmines are commonly used due to their convenience, inconspicuousness, and the insanely long 50 second unconsciousness timer. They're commonly covered up with clothing, placed within doorways of military barracks and hotspots, as well as gaps in fences, grass patches, and dark areas that require a flashlight. When normally dropped on the ground by holding G they're not immediately active, so you can take your time to cover them up before arming it. When initially armed, a clicking noise will start, audibly showing the 10 second grace period, allowing you to move freely over the mine until the grace period is up.You can attempt to disarm a less than badly damaged landmine with a lockpick. There's a 10% chance it will explode, you could also use either a screwdriver (20% chance) or a knife (40% chance) I guess...! Every disarming will make the landmine lose a durability tier, making badly damaged landmines have a 100% chance of exploding when disarmed.
You can only tell a landmine is set or not by looking at it and seeing if it has the disarm option popup. Landmines will explode in your inventory when you take damage, making it a necessity to carry it in another container. Once placed, they remain on the ground for 7 days if nobody steps in it or disarms it during this time. If the server restarts during the grace period of the mine arming itself, it will despawn.
They have a small potential of instantly killing a full health survivor, since the broken neck/head stat in this game is incredibly broken. Wearing a helmet has no effect on this either. They're not the most powerful explosive, but if you're less than half full health it will wipe you out. But in comparison, you'll need 24 landmines to kill a bear, and only 4 claymores, and 2 plastic explosives.
* Claymores
Found in high tier military areas, as well as dynamic events such as helicopter crashes, military train cars, and military convoys. Claymores come in green kits with the claymore and the attaching detonator trigger inside. You can either manually detonate it using the trigger, attach the trigger to a tripwire, or just ruin the claymore or claymore kit by shooting it to have it detonate. As with landmines, you'll need to keep it in a container to keep it from exploding in your inventory when you take damage.They work a little differently than other explosives, with a wide cone of directed health and shock damage up to 25 meters instead of a large circular radius. Though mind yourself, even if you're standing behind the claymore's cone, if you're within 10 meters you can be knocked unconscious with a large amount of health taken from you.
You can safely disarm claymores with the remote it came with, or with any other remote detonator for that matter. The remote will be taken from you and packed back into the claymore kit, so if you do use a different remote rigged to a different explosive, you won't be able to trigger it anymore. You can disarm a claymore using the normal disarming tools, but there's barely a point in doing this as it won't be usable afterwards, and if it's ruined by your disarming, it will explode.
Claymores have a small place in base raiding. Six will take down one wall, but bases are usually made with multiple chambers, keeping their loot behind multiple walls like a matryoshka doll.
* Plastic Explosives
Rarest and most explosive of the explosives in DayZ. You'll find them while wandering industrial areas with the "unique" tag, and especially in military base industrial buildings. They're rare to find, and require a detonation device or a tripwire to explode. When shot, grenaded, or otherwise damaged until ruined (even while actively armed) they will not explode. They will not explode in your inventory either. They are repairable using an electrical repair kit.They have a massive place in base raiding, taking only two plastic explosives to destroy an entire wall, or one to blow a big breach. It also only takes 2 to kill a bear. They are the most powerful item to use in combination with something else (or even itself) in making an improvised explosive device.
* Improvised Explosive Devices
Are the ultimate bomb that's completely customizable to your choosing. They are not naturally spawning. To craft this, all you'll need is a protective case and an electrical repair kit. From then you can choose your one or two explosives and detonation method. There are four different ways to detonate the IED, using a tripwire, detonation unit, or by cranking a kitchen timer or setting an alarm on an alarm clock.You can use frag grenades, flashbangs, smoke grenades, PO-X vials, PO-X 40mm grenades, 40mm explosive grenades, 40mm smoke grenades, plastic explosives, and landmines in any combination of 2. The bright yellow case will require some conjuring to cover up from being so noticeable. You cannot ruin the IED to make it explode. Once you've put the explosives and detonator in the IED, you cannot move it around, so make sure to do it where you want it to explode. You can't directly bury the IED, but placing it into a container and burying the container, you can then place a tripwire over it with the remote trigger attached and it will act like a buried mine.
IEDs are the perfect size to place inside infected's inventories, or you could put it in someone's inventory while they're tied up or unconscious. with the combation of explosives and detonation methods, there are so many options with them. It's genuinely nutty but nobody really goes out of their way to make these, unfortunately.
* Tripwires
Both detonators and traps themselves. Not naturally spawning, and easily not set off by slow walking through them (holding CTRL while walking). Causing a player to trip forward when walked through, you can rig a tripwire to explosives and grenades. Grenades have a fuze timer, meaning the player will have enough time to run away if they realize what they stepped into. This is why frag tripwires with a bear trap are an extremely deadly combination to walk into if you're not looking. There are many, many different ways to use tripwires.back to top
 VII. Going South
* Going south on Namalsk is a decision you can make at any point, but having certain items will aid you so greatly that it’s worth spending more time looting around or even killing players in the North before you commit to fully traveling away from the towns in the north.
* The south is desolate and easy to get lost in with the occasional blizzard. Grassy hills and snowy mountains take up much of the land, meaning both prey and predators spawn everywhere, and the chance of running into another player can be life-ending with no true cover other than tree trunks and pine branches.
There are no towns and no hospitals, meaning canned food will be something of the past as you divert to hunting inland and fishing in the ocean. All ponds are frozen and there are only 2 water pumps, meaning water will have to be made from melting snow found on the mountains and then purified to keep you from getting sick.
Basics: Here is everything you need to worry about, shopping list style. Two knives, a gun with ammo, multiple disinfected rags, and as much medicine you can find. Optional but extremely helpful: a cooking pot, rope, and a compass.
You’ll need the sharp objects to open cans and cut things into rags, do not use them as melee weapons as much as you can to prolong their durability. Any clothing, armor, and tool reparation items are extremely helpful: sewing kits, duct tape, leather kits, epoxy, and sharpening stones - but not top priority. Save your bullets for hunting for food or defending yourself from wolves, bears, and other players.
A melee weapon is always good to take military zombies out faster, but should be dropped when you find another gun to put on your shoulder. Remember to pick up any stones you find on dirt paths and any piles of bones from cut up carcasses/corpses. Both can be used on itself to craft a improvised knife: stone + stone or bone + bone.
Medicine: Multivitamins are the single most helpful item to survive down south with. Tetracycline only cures progressed sicknesses, while vitamins will prevent the contraction. Vitamins can be used to give you 5 minutes to eat predator meat, raw meat, dirty snow/water, and eating with bloody hands. Starvation is an extreme possibility down here, as prey animals don't usually spawn in abundance. If you have to resort to eating players, vitamins will not help against the contraction of kuru.
Hunting and Fishing: This will be your only incoming source of food from now on. For food you found up north, eat smaller cans of food first and save bigger cans for a large meal in a pinch. Eating warm food will boost your temperature quickly and help fend off the flu, and heating all the cans you can to use as heatpacks will greatly increase the time you'll spend being warm.
To hunt, all you need is a gun with ammo and a knife to cut the carcass. To fish, all you need to carry with you is rope and a knife, and carrying a hoe with you is helpful as well. Harvesting a long stick and combining it with the rope will craft an improvised fishing rod. Break other long sticks into small sticks and combine them with a knife to craft improvised fishing hooks. Use your knife to slowly dig up worms to put on the hook, if you have a hoe it will harvest 5 worms instead of 1 per interaction circle.
Gas stoves should be strived for as they make quickly cooking lots of food very easy. (Gas stovetop + cooking pot + gas canister.) Don't carry the gas canister without it being in a container or combined onto the stove.
Purifying Water: There is one item that will help you live off the land and avoid traveling to the 2 pumps at the crossing and Norinsk: a cooking pot. Not only does this carry much more water than any container, but it's the only item you can boil water in, meaning you won't need any water purification tablets. Of course, living off of scooping snow into water bottles and using water purification tablets is still a viable option.
back to top
 * 2008 Namalsk Arma I Mod and Map Lore
 * Misc. Facts and Previous Features
 * After You Play...
Please help keep the endgame something you have to seek out yourself. Keeping the details shrouded in mystery while teaming up with someone new to Namalsk will help preserve the magic of Namalsk's mission.
I was worried I'd put the information too readily out here at first, but after years of playing Namalsk it's so convoluted that people responding to comments and forums replies didn't know for sure themselves, because it is truly that difficult of a mission that not everyone replying have done it themselves! I am still not an absolute master of playing Namalsk so if I've left anything out, please dm or email me.
The ambient soundeffects heard across Namalsk are original to the Arma mod. If you heard children playing or someone distantly crying out for help or screaming, you heard this ambience. These sound effects are my absolute favorite part of playing on Namalsk. Listen to them all here. The coast sampling originates from Unreal Tournament 3 and the children are a sample most remembered from Call of Duty 4.
 Namalsk Original Soundtrack by Bubson
You've made it this far. Help yourself to my favorite moments & clips that showcase Namalsk in its truest form. They open in a new tab automatically.

* Spawntown & Freshies 1. 2. 3. 4.
* Vorkuta 1. 2. 3. 4. 5. 6.
* Gravity & Physics 1. 2. 3. 4. 5.
* Grenades 1.
* Landmines & Explosives 1. 2. 3. 4. 5. 6. 7.
* Sniping 1. 2. 3. 4. 5.
* Parkour 1. 2. 3. 4. 5.
 Mission/Endgame Clips
* GRW ER7 Gauss Rifle 1. 2. 3. 4. 5.
* Athena Research Institute 1. 2. 3. 4. 5.
* A1, A2, A3, A4, Phoenix 1.
Strikeout = Feature removed from current patch
You can no longer repin an unpinned grenade after it's dropped to the ground.